Filipino HJUers Kai
- Thread starter GekiDan
- Start date
You are using an out of date browser. It may not display this or other websites correctly.
You should upgrade or use an alternative browser.
You should upgrade or use an alternative browser.
- Status
- Not open for further replies.
Member
- Joined
- Apr 7, 2008
- Messages
- 899
80-20 ako .. so most likely pupunta tlag ako ")
I'll show you something scary...
- Joined
- Feb 27, 2005
- Messages
- 487
pepakura for noobs
What is Pepakura?
Pepakura Designer allows you to create a development for paper craft easily from 3D data used in 3D CG software. You can load a 3d image and make adjustments (not featured in this tutorial) or you can load already saved files from Pepakura and print them out to assemble a 3d object using only paper!
What is pepakura printed on?
The .pdo files that are shared here are saved to be printed on A4 paper. This is a universal standard size paper. To use 8 1/2" x 11" paper (Letter) or 8 1/2" x 14" paper (Legal) we will have to change the settings and manipulate the images to make sure they fit on the paper. But don't worry, we will cover that in this tutorial. ;-)
What type of paper works best?
If you are planning on using the print-outs from Pepakura to place onto another medium (such as cardboard or foam board) you can easily print the designs on regular computer or copy paper. However, if you plan on using your printed pieces of paper as your main structure, I recommend printing on card stock paper. You can find bundles of card stock at just about any paper store, or for a much easier (and probably cheaper) find, head over to your local school supply and book stores.
Part I: Downloading Pepakura
To download Pepakura, you will need to visit the URL below, which is Pepakura's website and download the pepakura viewer program:
http://www.tamasoft.co.jp/pepakura-en/
From here, you will want to select "Download" from the left. Once on the download page, select Pepakura Designer. Once that is selected, follow the download and installation instructions on that page.
pepakura viewer and designer tutorial vids
[ame="http://www.youtube.com/watch?v=7K499GEHcLU"]YouTube - Broadcast Yourself.[/ame]
[ame="http://www.youtube.com/watch?v=skDydmMVRUI"]YouTube - Broadcast Yourself.[/ame]
How To Make Good Folds For Pepakura Armor
This is a tutorial on how to fold the lines on Pepakura correctly and clean.
1. The supplies for this folding method that you will need are:
- 2 pens (try using 2 different colors)
- 1 ruler (metal rulers work best for this)
2. First you must assign the pens to a certain fold. (remember you must keep them the same through out the process)
Example:
Pen = Valley fold lines
Black Pen = Mountain fold lines
NOTE: In some cases it is seen that a models valley fold and mountain fold line style is swapped to the opposite line style**
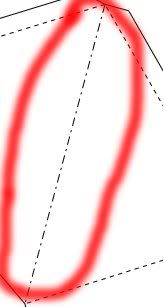
3. Cut out the piece you are going to be folding.
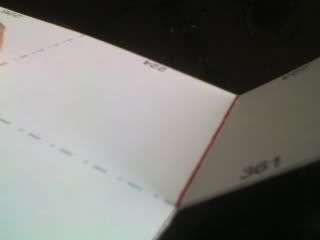
4. Set up the Ruler so it is parallel to the line you are going to score, make sure that it is a bit close, as seen here:
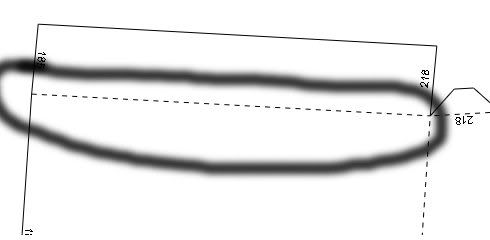
5. Then, your going to want to take the pen you assigned to valley fold or mountain fold and go over the line 3 or 4 times pressing semi hard with the ruler as a guide to keeping the pen straight and on the original line.
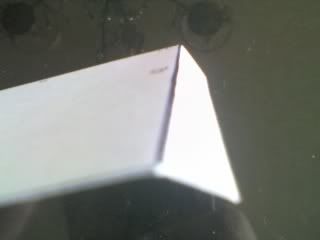
6. Once you have done that, you may fold the paper accordingly to come out as a nice clean fold.
VALLEY FOLD
MOUNTAIN FOLD
Pepakura Folding Tutorial
This next folding technique requires the use of sharp utensils so please be very careful upon doing this.( I am not responsible for any injury that can occur! )
This next tutorial is for all you veteran folders out there who don't feel the need to use pens in order to fold your armor.
(So if you are a first time folder I suggest you look at the first tutorial of this topic to learn more.)
Alright then, some of the things your going to need for this procedure are:
-An X-acto Knife
-a couple of spare X-acto blades
-One metal ruler
-Something to work on that will not allow the pressure of scoring to bleed through onto a nice table/counter top.
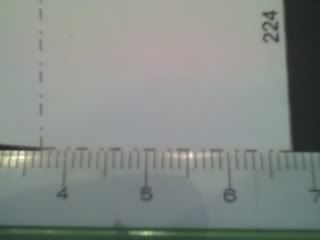
1. First, cut out the piece that you will be scoring.
2. Next, Position the piece so that there is enough room to move your X-acto knife and arms freely.
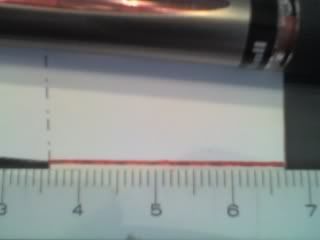
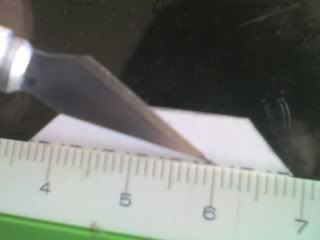
3. Then, taking the side of the X-acto knife, you'll need to gently make a small crease, using the ruler as a guide. Its your choice on whether or not to use the blunt or sharp side, but my advice is to use the blunt side, to ensure that you don't cut the flap off.
(DON'T PUSH TO HARD OR YOUR FLAP MAY COME OFF! *REMEMBER* YOUR NOT USING PENS ANYMORE, SO IT'S IMPORTANT TO REALIZE HOW MUCH PRESSURE YOU ARE PUTTING INTO YOUR SCORE.)
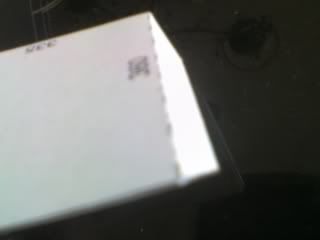
4. After you have done your score you may now fold your paper to its proper shape. [/i]
What is Pepakura?
Pepakura Designer allows you to create a development for paper craft easily from 3D data used in 3D CG software. You can load a 3d image and make adjustments (not featured in this tutorial) or you can load already saved files from Pepakura and print them out to assemble a 3d object using only paper!
What is pepakura printed on?
The .pdo files that are shared here are saved to be printed on A4 paper. This is a universal standard size paper. To use 8 1/2" x 11" paper (Letter) or 8 1/2" x 14" paper (Legal) we will have to change the settings and manipulate the images to make sure they fit on the paper. But don't worry, we will cover that in this tutorial. ;-)
What type of paper works best?
If you are planning on using the print-outs from Pepakura to place onto another medium (such as cardboard or foam board) you can easily print the designs on regular computer or copy paper. However, if you plan on using your printed pieces of paper as your main structure, I recommend printing on card stock paper. You can find bundles of card stock at just about any paper store, or for a much easier (and probably cheaper) find, head over to your local school supply and book stores.
Part I: Downloading Pepakura
To download Pepakura, you will need to visit the URL below, which is Pepakura's website and download the pepakura viewer program:
http://www.tamasoft.co.jp/pepakura-en/
From here, you will want to select "Download" from the left. Once on the download page, select Pepakura Designer. Once that is selected, follow the download and installation instructions on that page.
pepakura viewer and designer tutorial vids
[ame="http://www.youtube.com/watch?v=7K499GEHcLU"]YouTube - Broadcast Yourself.[/ame]
[ame="http://www.youtube.com/watch?v=skDydmMVRUI"]YouTube - Broadcast Yourself.[/ame]
How To Make Good Folds For Pepakura Armor
This is a tutorial on how to fold the lines on Pepakura correctly and clean.
1. The supplies for this folding method that you will need are:
- 2 pens (try using 2 different colors)
- 1 ruler (metal rulers work best for this)
2. First you must assign the pens to a certain fold. (remember you must keep them the same through out the process)
Example:
Pen = Valley fold lines
Black Pen = Mountain fold lines
NOTE: In some cases it is seen that a models valley fold and mountain fold line style is swapped to the opposite line style**
3. Cut out the piece you are going to be folding.
4. Set up the Ruler so it is parallel to the line you are going to score, make sure that it is a bit close, as seen here:
5. Then, your going to want to take the pen you assigned to valley fold or mountain fold and go over the line 3 or 4 times pressing semi hard with the ruler as a guide to keeping the pen straight and on the original line.
6. Once you have done that, you may fold the paper accordingly to come out as a nice clean fold.
VALLEY FOLD
MOUNTAIN FOLD
Pepakura Folding Tutorial
This next folding technique requires the use of sharp utensils so please be very careful upon doing this.( I am not responsible for any injury that can occur! )
This next tutorial is for all you veteran folders out there who don't feel the need to use pens in order to fold your armor.
(So if you are a first time folder I suggest you look at the first tutorial of this topic to learn more.)
Alright then, some of the things your going to need for this procedure are:
-An X-acto Knife
-a couple of spare X-acto blades
-One metal ruler
-Something to work on that will not allow the pressure of scoring to bleed through onto a nice table/counter top.
1. First, cut out the piece that you will be scoring.
2. Next, Position the piece so that there is enough room to move your X-acto knife and arms freely.
3. Then, taking the side of the X-acto knife, you'll need to gently make a small crease, using the ruler as a guide. Its your choice on whether or not to use the blunt or sharp side, but my advice is to use the blunt side, to ensure that you don't cut the flap off.
(DON'T PUSH TO HARD OR YOUR FLAP MAY COME OFF! *REMEMBER* YOUR NOT USING PENS ANYMORE, SO IT'S IMPORTANT TO REALIZE HOW MUCH PRESSURE YOU ARE PUTTING INTO YOUR SCORE.)
4. After you have done your score you may now fold your paper to its proper shape. [/i]
ジェイ・イー・フュージョン
- Joined
- Jun 2, 2007
- Messages
- 16,372
Nasend ko na sa FB inbox mo.Ui nice o.... gusto ko ng Rider...XD
- Status
- Not open for further replies.
Similar threads
- Replies
- 438
- Views
- 64K
- Replies
- 7
- Views
- 1K
- Replies
- 0
- Views
- 467


